I finally got a video of the dish. Here it is!
Friday, September 23, 2011
Tuesday, September 6, 2011
Counter balance fabricated and installed.
This part of the project took many hours between my Dad my brother and myself. We had to fabricate 3 brackets which attached to the back of the dish, two 6' arms, one 50" arm, and one plate to hang our weights off of.
The end result was very encouraging. We now have a near 50/50 weight distribution which will reduce the load on our actuators significantly.
The end result was very encouraging. We now have a near 50/50 weight distribution which will reduce the load on our actuators significantly.
Tuesday, July 26, 2011
Tracking completed (really!) and half the mirrors are on
So the tracking system from heliotrack.com works great! All I had to do was hook up the wires and it did its thing. There are a few issues that I thought this system would address though, but it won't directly.
1. It doesn't have any relays to hook up a water pump when its tracking.
2. There is no way to integrate any safety measures based on water temp.
I'm working on both of these issues. I believe I have 1 figured out. I have a pretty good idea for 2, but it'll need some testing.
Now for the good part. I was able to get half the mirrors on over the past weekend. It's pretty impressive in person. I'll be taking better pictures in the near future.

Sunday, July 17, 2011
Updated tracking system is getting the job done
I had some big issues with the last tracking system. I decided to go with a heliostat dual axis solar tracker. I hooked it up in the morning and it tracked the sun all day without needing a single adjustment. The only I made to it so far is to park the dish back in the East. This is a very nice feature.
Starting this weekend I'll be glueing mirrors onto the dish. I figure this will take a solid month. During this process I'll also be adding bracing for the second actuator, creating a collector out of soft copper tubing, and possibly getting a pump and preparing that for integration for the tracking system.
Starting this weekend I'll be glueing mirrors onto the dish. I figure this will take a solid month. During this process I'll also be adding bracing for the second actuator, creating a collector out of soft copper tubing, and possibly getting a pump and preparing that for integration for the tracking system.
Thursday, June 2, 2011
Tracking system continued
So the tracking system is working, but it's just not accurate enough at this point. I've ordered a third sensor and I'm going to lengthen the tubes that allow the light to hit the sensors. I believe I'm currently getting too much light in the tubes even when it's not pointed at the sun. Lengthening the tubes should help that.
The shielded extension wires for the sensors are out of stock so it may be a week or two until I receive the parts.
The shielded extension wires for the sensors are out of stock so it may be a week or two until I receive the parts.
Monday, April 18, 2011
Tracking system created, tested, and almost ready to go
This weekend I created a tracking system for the dish. It uses two photosensors which I put in pvc tubing. I then hooked these up to a FUSION BRAIN. The fusion brain is a micro controller that can be easily programed from a PC. I also took 4 on-off relays and wired them up so that based on the difference in my two photosensors it will either make the dish move toward the highest sensor or do nothing if the difference between the two sensors is too low.
I didn't have enough time to get it mounted to the pole, but I will probably be able to get to that this Saturday. I'll take pictures then as well and possibly a movie of everything working.
Once this part of the project is finished, I can start putting mirrors on the dish! I'm pumped!
I didn't have enough time to get it mounted to the pole, but I will probably be able to get to that this Saturday. I'll take pictures then as well and possibly a movie of everything working.
Once this part of the project is finished, I can start putting mirrors on the dish! I'm pumped!
Tuesday, April 5, 2011
The dish moves!
So the counterweight idea didn't work so well. What we ended up doing was putting an actuator on each side of the dish. We also attached garage door springs to each side to try and take some of the weight off of the actuators when it was to either side of the pivot point. This worked VERY well.
Next will be building a weatherproof box for the electronics and then setting up the automated tracker. Until then here are some new pictures.
Next will be building a weatherproof box for the electronics and then setting up the automated tracker. Until then here are some new pictures.
 |
| This is the left side of the dish. The dish is centered so the spring doesn't have any tension on it. |
 |
| Right side of the dish. Again, no tension. |
 |
| Here you can see how close both actuators are to touching. The wiring looks like a mess, but when it's all in the weatherproof case it will look nice and neat. |
 |
| The dish is pointed to the left here. You can see the right spring is extended. This will make pulling the dish back around much easier on the actuators. |
 |
| This is a bit of a mess. We'll probably get a smaller chain and attach it closer to the bracket at some point. |
 |
| Here is the dish partially to the right. It's starting to put tension on the spring. |
Wednesday, March 16, 2011
Time to add counterweights
This is something I didn't account for originally. What's happening is the weight isn't distributed on the pole evenly. What this is doing is making it hard for the actuator to move the dish using the entire range available to it.
The solution is going to be to add a 3 - 4 foot pole out of the back of the dish and attach counterweights as needed until things become more balanced. We'll also be adding a mount for the vertical actuator and moving the mount for the horizontal actuator to the right 5 or 6 inches.


The solution is going to be to add a 3 - 4 foot pole out of the back of the dish and attach counterweights as needed until things become more balanced. We'll also be adding a mount for the vertical actuator and moving the mount for the horizontal actuator to the right 5 or 6 inches.


Monday, February 21, 2011
Phase 3: Attach dish to pole and test structural stability
This phase will involve getting the dish onto the pole and then making sure it's not going to fall over, blow over, bend, rock, tilt, sway, ect, ect. This is the phase I am currently on. This past weekend I have gotten the dish onto the pole. Today is the first full day that it will be exposed to the elements.
We will most likely let it as is for a week or two to the wind some time to take a whack at it. During this time we plan on adusting the pivot point to make it as easy as possible for the dish to move in a way that is most accurate with the way the sun moves across the sky. I may get a weatherproof box together to store the electronics during this time as well. I'll update this post as this phase continues.
p.s. Pictures of the dish attached to the pole will come this weekend. It's HUGE!
Additionally, I cleaned up the dish with a pressure washer.

UPDATE:
I've completed attaching the dish to the post with the help of my dad and brother. We also lined it up partially and tried running the actuator. The 24v 1A dc power supply just can't cut it. I'm in the market for a 36v 3A replacement.


Phase 2: Acquire longer pole, prepare for cement, and erect 10' satellite dish in final position at my parents house.
In this phase I needed to get a longer pole and get a hole dug big enough to fit a wooden box we made for the concrete.y
Where I work we have access to 2" tubular steel. The maintenance guy was kind enough to weld a bunch of these pieces until we had three 2" diameter 10' or so poles. These were then welded together. Ideally this pole would get the dish above the tree line you can see, but what we got should get us the majority of the days sun.
To prepare for the concrete we invested in a backhoe. This was the costliest part of the project. We dug a big ol' hole and stuck our box in. We had already ran our water and power lines by this point.
Here's the result.


Phase 1: Acquire 10' satellite dish and transport home
Here's how this phase works. I need to find a dish as close as possible to my parents house, for as little cost as possible, and with as little hassle as possible. I then need to transport this bad boy to my parents house.
Here's how it worked out. I found an older gentleman that had one in his back yard who was thrilled that I was willing to haul away this thing he had to mow around every week for free. He told me he had paid over $4500 for it and the equipment many years ago when c-band was still popular. He told me he would let the dish go for free, but he wanted $20 or $25 for the electronics used to control it.
That weekend my dad brought his trailer over and we disassembled the dish and brought it home. It was a really nice day out which made things nice.
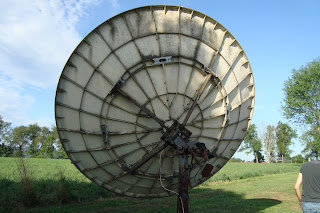
 |
| That's actually mold on there. Yeah, gross. I did power wash it off which helped a lot! |
 |
| I said it was a nice day out :). |


Introduction - What is a solar dish and what is this project about?
Here is the goal:
The concept is fairly simple. The idea is to focus as much light as possible onto as small of an area as possible which focuses the suns energy on water which is then used for various heating applications. My work is completely motivated by others that have done similar projects. Their videos are posted on youtube and I recommend searching for them.
To put this concept to a practical application my plan is to take an old 10' satellite dish, cover it in 4"x4" mirrors and then collect the resulting heat in circulating water, and then use that hot water as preheated water for my parents domestic hot water.
Sounds simple!
Here's a breakdown of the general phases of the project.
Phase 1: Acquire 10' satellite dish and transport home
Phase 2: Acquire longer pole, prepare for cement, and erect 10' satellite dish in final position at my parents house
Phase 3: Test structural stability
Phase 4: Configure electronics and safety equipment
Phase 5: Cut and assemble mirrors onto the dish
Phase 6: Connect collector and water lines
Phase 7: Test
Subscribe to:
Comments (Atom)